
DxO OpticsPro
Summary
DxO OpticsPro is a powerful image editor for editing RAW files from digital cameras. It is aimed specifically at the prosumer and professional markets and is an incredible time-saver for professional photographers who have to process large numbers of RAW files as quickly as possible. It has a truly impressive range of automatic image correction tools based upon the EXIF data of each photograph and the extensive testing of each lens performed by DxO in their labs.
The only issues that I ran into while using DxO OpticsPro 11 were very minor user interface problems that in no way compromised the effectiveness of the program. Its library management and organization aspects could be improved, but they’re not the primary focus of the program. Overall, OpticsPro 11 is an extremely impressive piece of software.
What I Like: Powerful Automatic Lens Corrections. 30,000 Camera/Lens Combinations Supported. Impressive Level of Correction Control. Very Easy to Use.
What I Don’t Like: Organization Tools Need Improvement. Some Small User Interface Issues. Expensive Compared to Similar Programs.
What is DxO OpticsPro?
DxO OpticsPro 11 is the latest version of DxO’s popular RAW image file editor. As most photographers are aware, RAW files are a direct dump of the data from the camera’s image sensor without any permanent processing applied. OpticsPro allows you to read, edit and output RAW files into more standard image formats such as JPEG and TIFF files.
What’s New in DxO OpticsPro 11?
After 10 versions of a piece of software, you might think that there’s nothing left to add, but DxO has managed to add an impressive number of new features to their software. Probably the biggest highlight is the improvements made to their proprietary noise removal algorithm, DxO PRIME 2016, which now runs even faster with better noise control.
They’ve also improved some of their Smart Lighting features to allow spot-metered contrast adjustments during the editing process, as well as the functionality of their tone and white balance adjustments. They’ve also added some UI enhancements to allow users to sort through and tag photos more quickly, and improved the reactivity of various control sliders for a more seamless user experience. For the full list of updates, visit the OpticsPro 11 site.
DxO OpticsPro 11: Essential Edition vs ELITE Edition
OpticsPro 11 is available in two versions: the Essential Edition and the ELITE Edition. Both are excellent pieces of software, but the ELITE Edition features some of DxO’s more impressive software achievements. Their industry-leading noise removal algorithm, PRIME 2016, is only available in the ELITE Edition, as well their ClearView haze removal tool and anti-moire tool. For photographers who demand the most accurate color possible from their workflow, the ELITE Edition also includes expanded support for color management settings like camera-calibrated ICC profiles and camera-based color rendering profiles. Additionally, it can be activated on 3 computers at once instead of the 2 supported by the Essential Edition.
The Essential Edition is priced at $129 USD and the ELITE Edition costs $199 USD. While this might seem like quite a difference in price, my test of the ELITE Edition features indicates that it’s well worth the extra cost.
DxO OpticsPro vs Adobe Lightroom
At first glance, OpticsPro and Lightroom are very similar programs. Their user interfaces are almost exactly the same in terms of layout, and both use a very similar dark grey tone for all their panel backgrounds. They both handle RAW files and support a wide range of cameras, and can apply a wide variety of white balance, contrast and spot-correction adjustments.
However, despite these surface similarities, they’re quite different programs once you get under the hood. OpticsPro uses the impressively meticulous lens testing data from DxO’s labs to automatically correct for all sorts of optical issues such as barrel distortion, chromatic aberration and vignetting, while Lightroom requires user input to handle all of these corrections. On the other hand, Lightroom has a much more capable library management section and better tools for managing the filtering and tagging process.
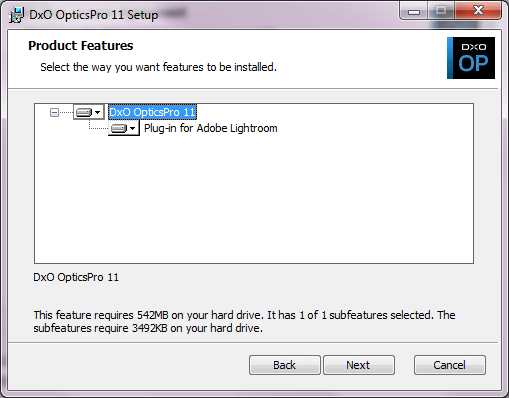
In fact, OpticsPro 11 installed a Lightroom plugin to allow me to use a number of the DxO features as part of my Lightroom workflow, which gives you an idea of how much more powerful it is as an editor.
Quick Update: DxO Optics Pro was renamed to be DxO PhotoLab. Read our detailed PhotoLab review for more.
Table of Contents
Why Trust Me for This Review?
Hi, my name is Thomas Boldt and I’ve been a photographer for well over a decade, both as a hobbyist and as a professional product photographer for everything from furniture to jewelry (you can see a few samples of my latest personal work at my 500px portfolio).
I’ve been working with photo editing software since Photoshop version 5 and my experience with image editors has only expanded since then, covering a huge range of programs from the open source editor GIMP to the latest versions of the Adobe Creative Suite. I’ve written extensively on photography and image editing for the last several years, and I’m bringing all of that expertise to this article.
Additionally, DxO provided no material or editorial input on this article, and I did not receive any special consideration from them for writing it.
Detailed Review of DxO OpticsPro
Please note that the screenshots used in this review are taken from the Windows version, and the Mac version will have a slightly different look.
Installation & Setup
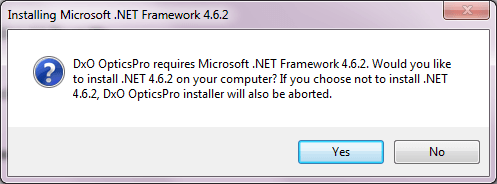
The installation process had a slight hiccup right at the start because it required me to install the Microsoft .NET Framework v4.6.2 and restart my computer before continuing with the rest of the installation, despite the fact that I’m certain that I already had it installed. Other than that minor issue, the installation was quite smooth and easy.
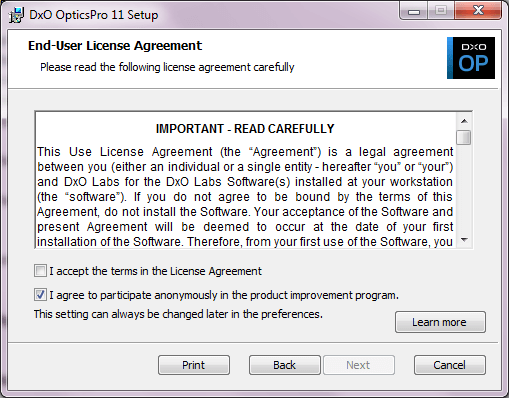
They did want me to participate in their anonymous product improvement program, but a simple checkbox was all it took to opt out. It’s largely concerned with the hardware you’re using, and you can learn the full details of the program here.
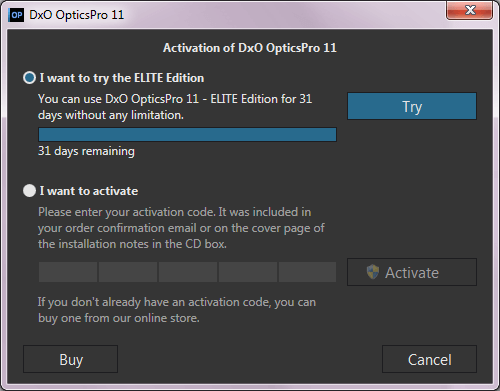
Since I wanted to test out the software for the first time before deciding to purchase it, I installed the program using the 31 day free trial of the ELITE Edition. It required me to provide an email address for registration, but this was a much quicker process than most required registrations.
Camera and Lens Detection
As soon as I opened DxO OpticsPro and navigated to a folder containing some of my RAW image files, I was presented with the following dialog box:
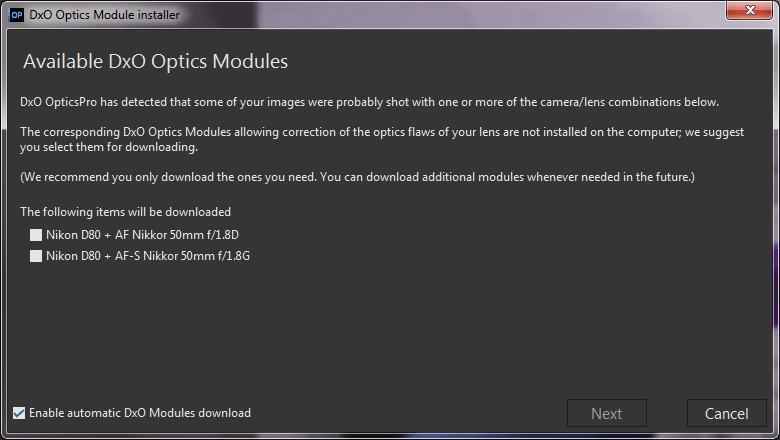
It was spot-on with its assessment of my camera and lens combination, although I am using the older AF Nikkor 50mm instead of the newer AF-S version. A simple checkmark in the appropriate box, and OpticsPro downloaded the necessary information from DxO to begin automatically correcting the optical distortions caused by that specific lens. Having struggled with correcting barrel distortion in the past using Photoshop, it was a joy to watch it being fixed before my eyes without any further input from me.
In the end, OpticsPro correctly assessed all the lenses that were used for these personal photos, and was able to automatically correct for all of their optical flaws.
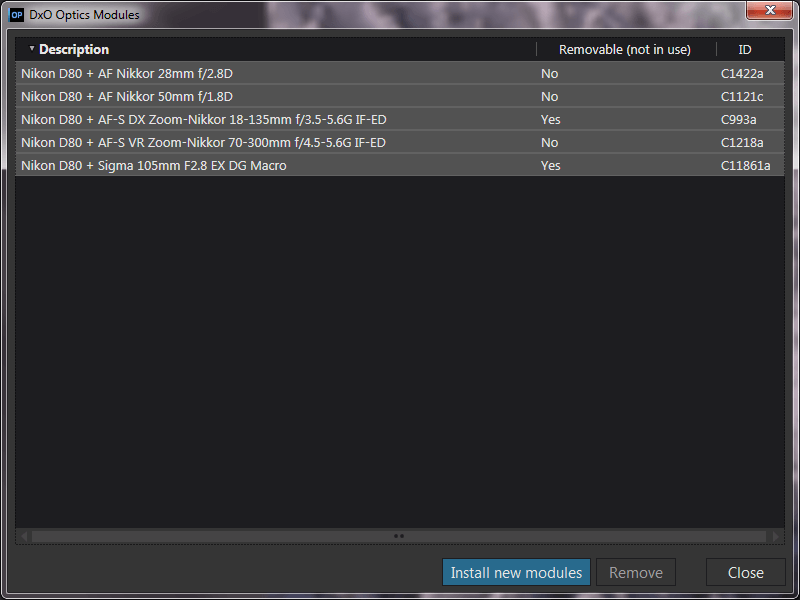
You’ll only have to go through that process once for each lens and camera combination, and then OpticsPro will simply get on with its automatic corrections without bothering you. Now onwards to the rest of the program!
The OpticsPro User Interface
OpticsPro is broken down into two main sections, Organize and Customize, although this isn’t quite as immediately obvious from the user interface as it could be. You swap between the two using buttons in the upper left, although they could be separated visually a bit more from the rest of the interface. If you’ve already used Lightroom, you’ll be familiar with the general layout concept, but those who are new to the world of image editing might take a big longer to get used to things.
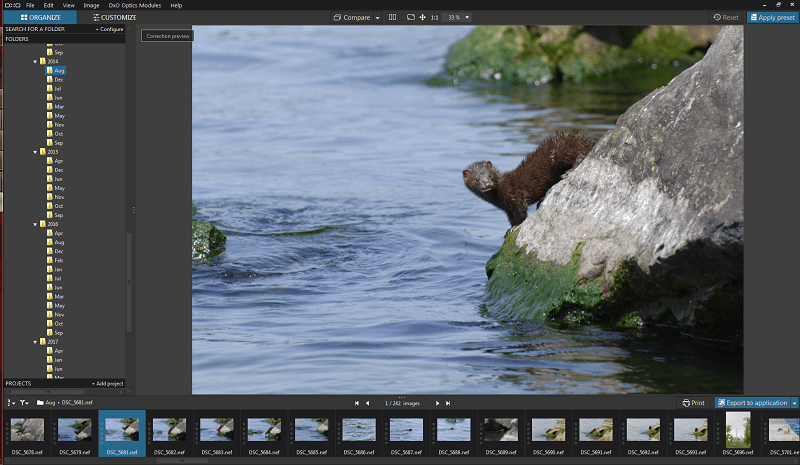
The Organize window is split into three sections: the folder navigation list on the left, the preview window on the right, and the filmstrip on the bottom. The filmstrip gives you access to rating tools for quick filtering, although they are limited to a simple 0-5 stars. You can then filter a specific folder to only show 5 star images, or only images that have yet to be exported, and so on.
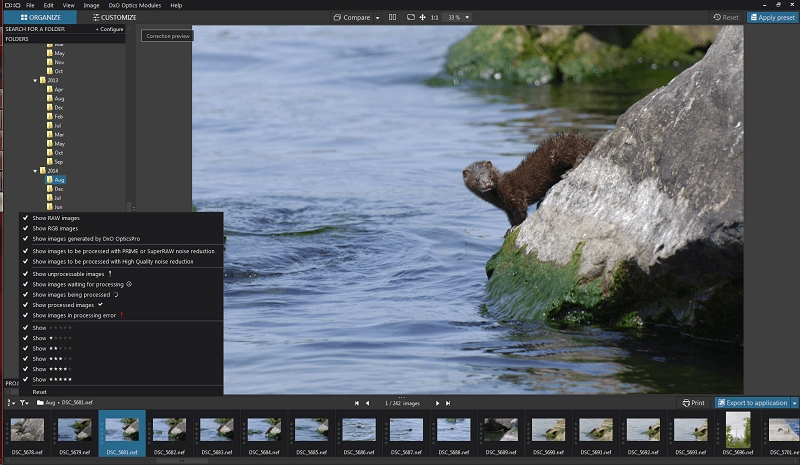
I have a bit of an issue with DxO’s decision to call the whole section ‘Organize’, because really most of what you’ll be doing here is navigating to various folders. There is a ‘Projects’ section that allows you to collect a set of photos into a virtual folder without moving the files themselves, but the only way to add images to a specific project is to select them, right click, and choose ‘Add current selection to project’. This could be useful for quickly applying preset adjustments to a large number of photos at once, but it could be done just as effectively using folders and actually separating the files. This feature feels a bit like an afterthought, so hopefully DxO will be expanding and improving it in the future to make it a more viable workflow option.
Editing Your RAW Images
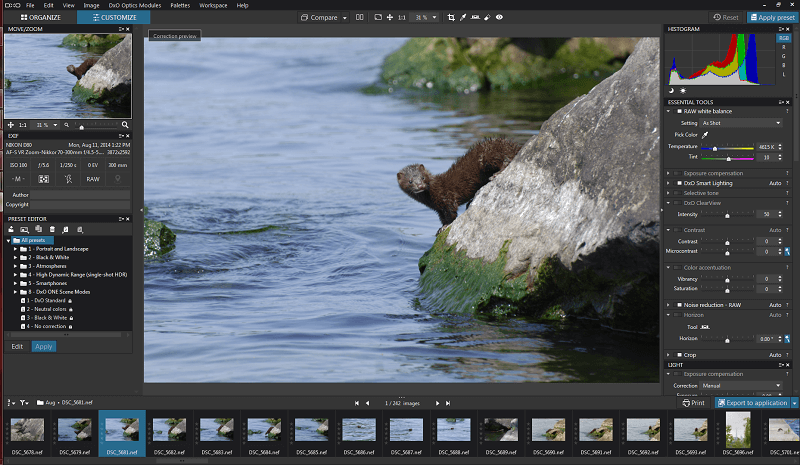
The Customize section is where the real magic happens. If it seems a bit overwhelming at first, don’t worry – it’s overwhelming because there is so much that you can do. Powerful programs always have to make a trade-off with user interface, but DxO balances it fairly well.
Again, Lightroom users will feel familiar with the layout, but for those who haven’t used that program either, the breakdown is quite simple: thumbnail preview and EXIF information appears on the left, the main preview window is front and center, and most of your adjustment controls are located on the right. There are a few quick access tools at the top of the main preview, allowing you to quickly zoom to 100%, fit to the window, or go fullscreen. You can also quickly crop, adjust white balance, straighten an angled horizon, or remove dust and red-eye. The filmstrip along the bottom is the same as in the Organize section.
DxO’s Custom Editing Tools
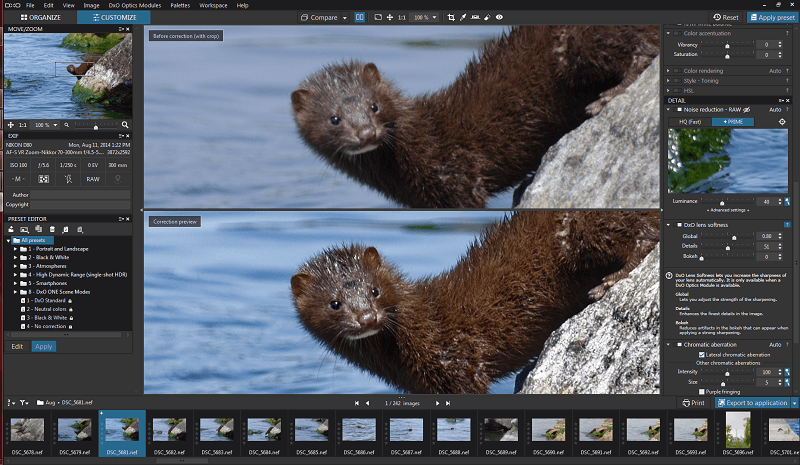
Since most of the editing features are fairly standard options for RAW editing that can be found in most image editors, I’m going to focus on the tools that are unique to OpticsPro 11. The first of these is DxO Smart Lighting, which automatically adjusts the highlights and shadows of your image to provide a better dynamic range. Fortunately for anyone new to the program, DxO has included helpful information right in the control panel that explains how it works.
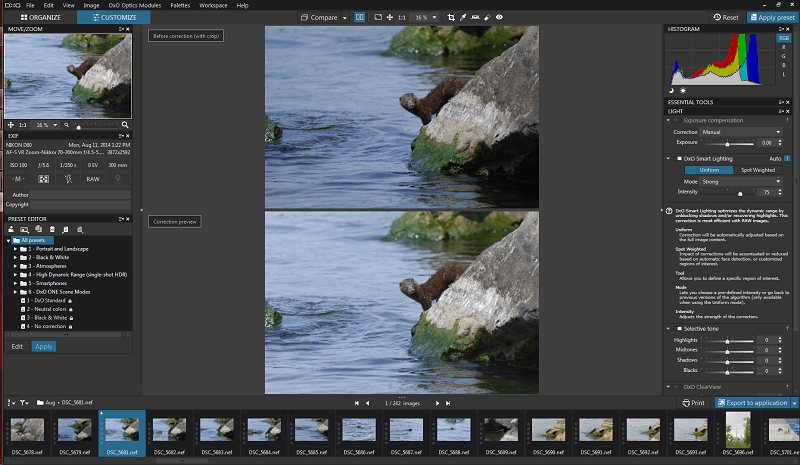
As you can see, the undersides of the cute little mink’s neck and belly are now much more visible, and the shadow under the rock he’s perched on isn’t so overpowering. There’s a bit of loss of color detail in the water, but we’ll get to that in the next step. All of the adjustments are editable for finer control over how they work, but what it can accomplish automatically is extremely impressive.
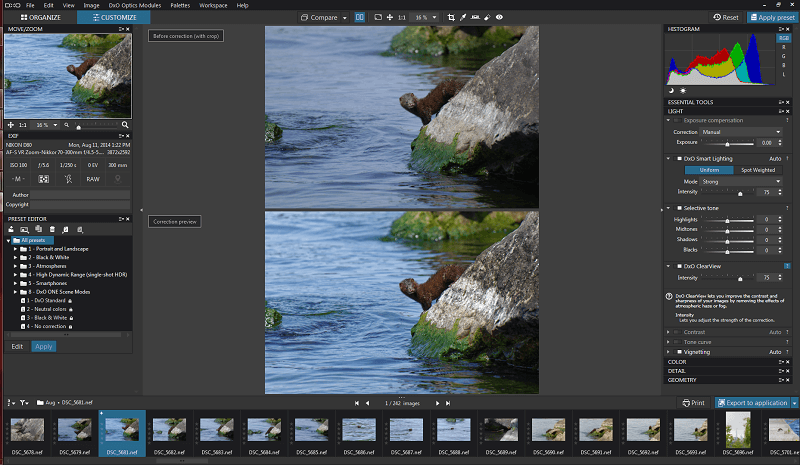
The next tool we’ll look at is one of my favorites, DxO ClearView, which is only available in the ELITE Edition. Technically it’s supposed to be used for removing atmospheric haze, but it accomplishes this with contrast adjustments, which makes it a useful tool in a lot more situations. A single click enabled it, and I adjusted the strength upwards from 50 to 75. Suddenly the color of the water is back, and all the colors in the rest of the scene are much more vibrant without looking oversaturated.
This isn’t a very noisy image, so we’ll come back to the PRIME noise reduction algorithm later. Instead, we’ll look closer at sharpening the fine details using the DxO Lens Softness tool. At 100%, the fine details don’t quite live up to reality – though in my defense, it was an entirely unexpected situation and I had to react as quickly as possible before he dove off to continue fishing. DxO to the rescue!
Lens Softness takes advantage of the lens modules we downloaded at the very beginning. DxO does extensive testing of virtually every available lens in their labs, comparing sharpness, optical quality, light falloff (vignetting) and the other optical issues that happen with every lens. This makes them uniquely qualified to apply sharpening based on the characteristics of the exact lens used to take your photos, and the results are impressive, as you can see.
So to summarize – I took a photo from decent to fully post-processed in about 3 minutes and with 5 clicks – that’s the power of DxO OpticsPro. I could go back and obsess over the finer details, but the automatic results are an incredible time-saving baseline to work from.
DxO PRIME Noise Reduction
But there’s one crucial tool we skipped over: the PRIME noise reduction algorithm that DxO calls ‘industry-leading’. Since the mink photo was shot at ISO 100 and 1/250th of a second, it’s not a very noisy image. The D80 gets quite noisy as the ISO increases, since it’s a relatively old camera by now, so let’s look at a much noisier image to test its capabilities.
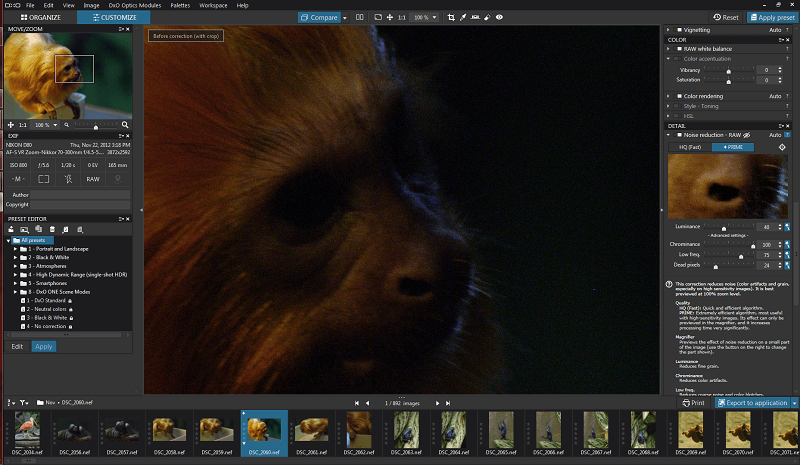
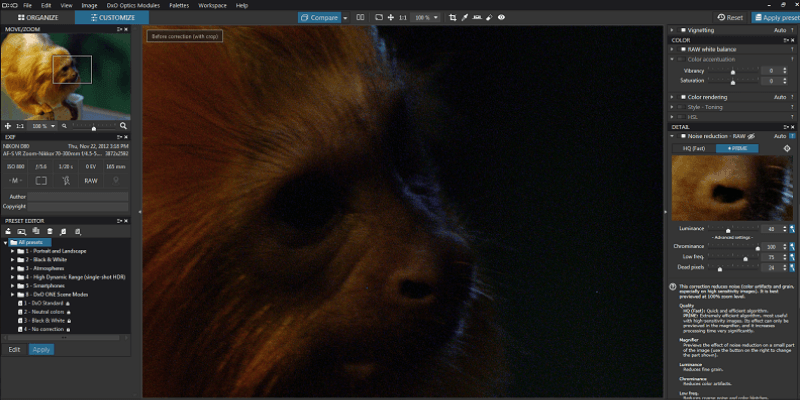
This Golden Lion Tamarin lives at the Toronto Zoo, but it’s relatively dark in their area so I was forced to shoot at ISO 800. Even still, the image wasn’t a winner, but it was one of the images that taught me to avoid using high ISOs due to the incredible amount of noise my camera’s sensor produced at those settings.
Given the heavy color noise visible in the source image, the default settings of the HQ noise removal algorithm produced amazing results, even after using default Smart Lighting and ClearView options which should make the noise much more noticeable. All color noise was eliminated, including the couple of “hot” pixels visible (the two purple dots in the upper uncorrected image). It’s obviously still a noisy image at 100% zoom, but it’s much more like film grain now than digital noise.
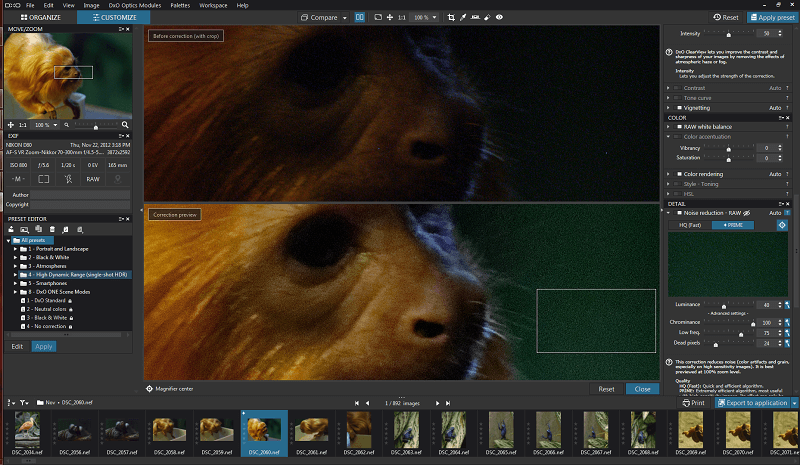
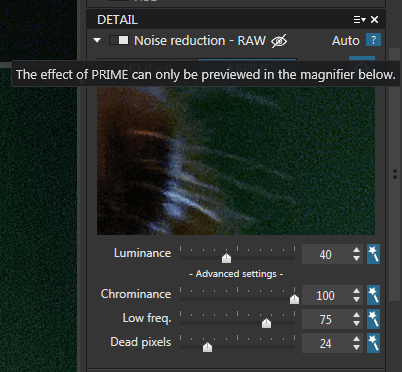
DxO has made a slightly unfortunate UI choice for using the PRIME algorithm. Surprisingly, considering that it’s one of their star features, you can’t actually see the effect of it live over the whole image, but instead you’re restricted to previewing the effect in a tiny window on the right.
I assume they made this choice because processing the entire image every time you make an adjustment would take too long, but it would be nice to have the option to preview it on the whole image. My computer is powerful enough to manage it, and I found that I couldn’t get a proper sense of just how it would affect all of the image from such a small preview.
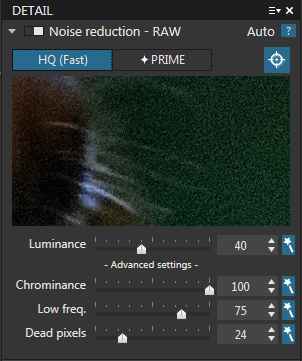
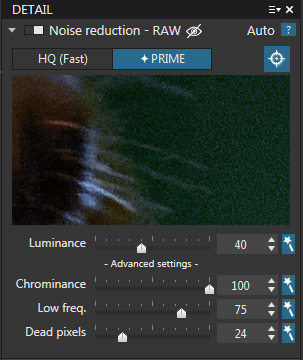
Regardless, what you can accomplish even with basic automatic settings is incredible. I could increase the luminance noise reduction beyond 40%, but it soon begins to blur color sections together, looking more like a heavily-processed smartphone image than a DSLR photo.
I spent quite a while playing with DxO OpticsPro 11, and I found myself extremely impressed with what it could handle. I was so impressed, in fact, that it made me start to go back through the last 5 years of photographs looking for images that I liked but never worked with because they would require a lot of complex processing with no guarantee of success. I will most likely be purchasing the ELITE Edition for my own photography once the trial time runs out, and it’s hard to give a better recommendation than that.
Reasons Behind My Ratings
Effectiveness: 5/5
OpticsPro is one of the most powerful editing programs I’ve ever worked with. While it doesn’t have the complete pixel-level control provided by Photoshop, it’s automatic lens corrections make its workflow second to none. The unique DxO tools such as Smart Lighting, ClearView and their noise removal algorithms are extremely powerful.
Price: 4/5
OpticsPro is somewhat expensive, at $129 and $199 for the Essential and ELITE editions, respectively. Other similar programs have moved to a subscription model that include regular software updates, but there are few competitors who offer the same value for money.
Ease of Use: 5/5
The automatic adjustments in OpticsPro 11 are a marvel to behold, and they can turn a barely acceptable image into a great one with almost no input from the user. If you do decide to dig deeper into the controls in order to fine-tune your image, they’re still quite easy to use.
Support: 5/5
DxO provides an impressive level of in-program support, with helpful explanations of every tool available right in the control panels. If you still find yourself with questions, there’s an impressive array of tutorial videos available online, and even free webinars showcasing some of the tips and tricks used by professionals. Additionally, there is an extensive FAQ list in the support section of the site, and it’s also easy to submit a support ticket for more technical issues – though I never found it necessary to do so.
DxO OpticsPro Alternatives
Adobe Lightroom
Lightroom is Adobe’s direct competitor to OpticsPro, and they do have a lot of the same features. It’s possible to handle lens correction and other issues using lens profiles, but it requires a lot more work to set up and will take much more time to implement. On the other hand, Lightroom is available as part of Adobe’s Creative Cloud software suite along with Photoshop for just $10 USD per month, and you get regular software updates.
Phase One Capture One Pro
Capture One Pro is aimed at the same market as OpticsPro, although it has more comprehensive organizational tools, localized editing and the option for tethered shooting. On the other hand, it lacks DxO’s automatic correction tools, and is far more expensive at $299 USD or $20 USD per month for a subscription version. See my review of Capture One here.
Adobe Camera Raw
Camera Raw is the RAW file converter included as part of Photoshop. It’s not a bad tool for working with small batches of photos, and provides a similar range of import and conversion options, but it’s not designed for working with entire libraries of images. It’s available as part of the Lightroom/Photoshop combo mentioned earlier, but if you’re going to be working extensively with a RAW workflow you’re better off with a more comprehensive standalone program.
Also Read: Photo Editor for Windows and Photo Editing Apps for Mac
Conclusion
DxO OpticsPro is one of my new favorite RAW converters, which even surprised me. The combination of fast and accurate automatic lens corrections with powerful image editing tools has made me seriously reconsider my use of Lightroom as my primary RAW workflow manager.
The only thing that gives me pause about it is the price ($199 for the ELITE Edition) because it doesn’t come with any updates, so if version 12 is released soon I’ll have to upgrade on my own dime. In spite of the cost, I’m very seriously considering making the purchase once the trial period is up – but either way, I’ll continue to use it happily until then.
Hi-
I am using PS CS3 on a Gateway NV76R series laptop (6GB DDR3 Memory, 500 GB HDD, 17.3″, Intel Core i3-3110M, HD Graphics 4000). I am looking for a better tool for processing camera raw (from Nikon 300s and Nikon 700). My intent would be to pre-process RAW files and finish process using PS CS3. Would Dx0 OpticsPro replicate and enhance how I am currently using PS CS3 and Bridge related to processing RAW (actually DNG) files and finalizing using CS3? Will my laptop host Dx0 OpticsPro?
Regards,
Vern Cimmery
OpticsPro is a bit out of date now – DxO has revamped the whole program and released it as DxO PhotoLab, which I’ll be reviewing as soon as possible!
PhotoLab should be able to run on that laptop, although I haven’t had a chance to experiment with it yet, so I’m not ready to say if it’s a good choice yet =)